PTU "Alice in Zombieland" Tutorial
This Tutorial was written by me, any resemblance to another tutorial is completely unintentional.
I am using Photoshop CS5 for this tutorial.
Tube
Tube used was one of the elements found in the scrap kit.
Scrap Kit
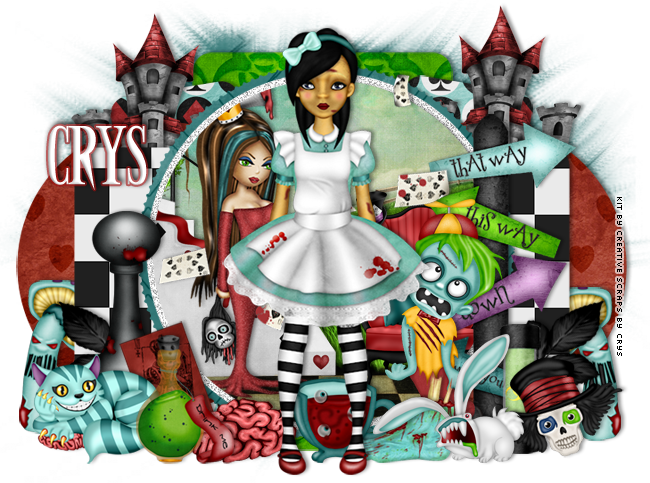
Alice in Zombieland by Creative Scraps by Crys
Font
Army of Darkness
Template
Template 727mpm
Mask
WSL241, you can download it in bulk on the side of her blog HERE.
K let's get started.
First open up your template and resize it with the largest side at 650 px. and then start with the papers. Here's what I used for each layer of the template:
Layer 9- AIZPaper_14
Layer7- AIZPaper_8
Layer 6- AIZPaper_10
Layers 5 & 4- AIZPaper_16
I merged Layers 3 & 2- AIZPaper_4
And for Layer 1- AIZPaper_17
With each paper, I simply positioned it above the layer I was using, and held down ALT as I clicked between the paper and layer.
Now for the elements-
For the inside of Layer 9 I used AIZ Element_22, AIZElement_33, and AIZElement_52. Then I used the same method for the papers to crop them inside of the circle.
As for the rest of the elements, here's what I used:
AIZElement_1
AIZElement_4
AIZElement_8
AIZElement_20
AIZElement_29
AIZElement_30
AIZElement_35
AIZElement_36
AIZElement_49
AIZElement_54
AIZElement_56
AIZElement_59
AIZElement_61
AIZElement_63, duplicated
AIZElement_64
AIZElement_69, duplicated
AIZElement_70, duplicated
I added a drop shadow to all elements and layers like so:
Now for the mask, I used the AIZPaper_8 with the mask I stated above and made it into an
oval shape, and then positioned it behind everything else.
For the name I used the font ArmyofDarkness, with the color white at 85 px.
Then I used the Layer Style Stroke with the color #980d0d, and then added a drop shadow like the one I used for the elements.
Now add your credits and there you are!
Thanks for checking out my tutorial!


Awesome tut!!!!
ReplyDeleteThank you for Sharing Miss Jackie! I did it! Fantastically easy to follow! :)
ReplyDelete