This tutorial was written by me, any resemblance to any other tutorial is completely unintentional.
PSP version used: PSP X2
Supplies:
Tube-
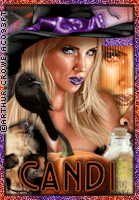
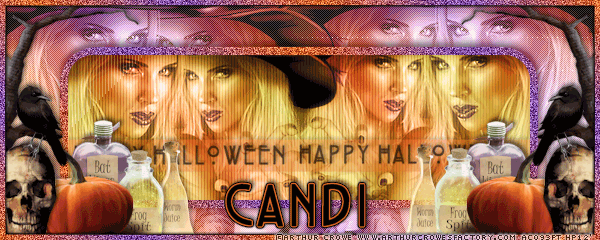
I'm using an awesome tube from Leonardo Preda called Get Your Guitars Girls. You can find this tube and his many other artworks at
indieZine.
Font- Sleepy Hollow
Filters-
VanDerLee- Interlace
dsb flux> Bright Noise
Eye Candy 4000> Gradient Glow & Glass
xero> Radiance
Okay let's get started, shall we?
Open up your template, and resize it to 600 x 477.
I deleted one of the stars and centered the other.
Open paper 4, resize 70%, copy and paste.
Big rectangle- Selections>Select all>Float>Defloat> Invert, down to paper layer, hit delete. Select None.
Open paper 17. Resize 70%, copy and paste.
Oval- Selections>Select all>Float>Defloat> Invert, down to paper layer, hit delete. Select None.
Open your close up, and duplicate it x2.
position behind star frame as you wish and then merge close up layers.
Selections>Select all>Float>Defloat>Invert> and hit delete. Select none.
Now duplicate the merged layer once more.
On the top duplicated layer, Adjust>Gaussian Blur> 5.0
Go down to your star background and Selections>Select all>Float>Defloat>Invert> go to the blurred layer and hit delete. Select none.
Put blend mode- Screen on this layer, and then go down to the star background layer again.
Chose 2 colors from your tube or scrap kit, I chose #a643a3 for the foreground and #e0181a for the background. Now create a gradient like so:
Flood Fill your star BG.
Now go to your original merged layer and set the blend mode to Luminancy (Legacy)
Back up to the screen'd layer and use plugin VanDerLee> Interlace with these setting:
Copy and paste your tube layer and resize 70%. Run plugin- xero>Radience with these settings:
Now create another gradient. I used #f404ee for the foreground and #a643a3 for the background, with the same settings as before.
Flood Fill your Rectangle with this gradient, and then open, copy and paste your full sized tube layer.
Position behind rectangle frame and Color Line rectangle. Toggle visibility for Color Line rectangle.
Duplicate and postion to where you can no longer see any gradient. Merge.
Duplicate x2.
For the top layer.
Adjust>Blur>Gaussian Blur> 3.0
Blend mode, Screen.
Original layer- Luminance
and middle layer- Softlight
Now use the plugin- VanDerLee>Interlace> with these setting:
Now make the Color Line rectangle visible again. Flood fill with one of your gradient colors, I chose the red. :) Not turn down the opacity to 40%.
Now go down to the Line Oval layer. Flood fill with one of your colors. I used the purple.
Bring up opacity to 70%
I threw a little bit of dsb flux> Bright Noise on there with 20 intensity, Mix.
Go to White Line. Flood fill with the red again.
Leave as is :)
Now for the boarders.
Boarder Oval- flood fill with the red.
Appy dsb flux> Bright Noise with a 50 intensity, mix.
Boarder rectange- go back to your gradient and flood fill. Bright Noise.
Boarder Star1 or 2 (which ever you decided to keep)- flood fill with the purple. Bright Noise.
Now for the Rockstar Layer.
Gradient #a444a2 foreground and #e20000 for the background. dsb flux>Bright Noise, 20, Mix.
Eye Candy 4000> Glass with these settings:
Rockstar boarder- Black.
Now on to the elements.
I used:
Winged Heart- resized 30%
Perfume- resized 40%
Microphone- resized 30%
Glitter 1, duplicated and mirrored.
Headphones- resized 30%
Cupcake2- resized 30%
Bow1- resized 30%
Balloon- resized 50%, duplicated and mirrored.
Sparkles2- resized 70%, duplicated and mirrored.
Sparkles1- resized 70%, duplicated and flipped.
Speaker- resized 30%
Don't forget your drop shadow on all your layers desired :)
Now I usually do my copyright first, so I can add as many names as I want to the tag, so make sure to have your correct copyright and license number visible on your tag.
Now for the name. I used Sleepy Hollow at 135 px., and I used the same purple we've been using.
No foreground.
dsb flux> Bright Noise> 38 Mix.
Eye Candy 4000>Glass, with these settings:
And Highlight settings down to your liking.
Selections>Select All>Float>Defloat>Modify>Expand 2.
New Raster Layer, flood fill black. position behind font.
Add your drop shadow, crop to your liking and you are DONE!!! :)
Thanks for following my tutorial! :)